Walkthrough and Tips
Download | Story | Characters | Music List | Bosses Guide | Walkthrough | Secrets
A rough guide providing tips for those of you having difficulty passing the campaign's difficult maps. When a boss is available refer to the Bosses guide for spoilers.
Mission 1-0: This mission is designed to help refamiliarize people with Starcraft, if necessary. There is a time limit to bring Xaax to the Arbiter Tribunal, however. At the start immediately tech-up to Overlord speed and transport upgrades, then produce as many troops as possible. With a bit of distraction you could easily fly Xaax to the Tribunal (he doesn't need to actually get off the Overlord, btw).
Mission 1-1: Cutscene mission.
Mission 1-2: Start by producing multiple Zerglings and Hydralisks; the computer's primary target will be your Zerg allies so you will want to advance your fighting line to the entrance of your ally's base. Without Guardians this mission can be difficult, but techning to Ultralisks wouldn't be a bad idea, as they can disk and soak plenty of damage for you.
Mission 1-3: A rigorous defense mission. Unless you allow them to get pass your front line the Protoss will always attack from the larger west entrance. Concentrate troops here, and, when possible, try to push the line forward enough to block the bridge between your base and the Protoss's. Containing the bridge will defeat most of the ground troops, but some Hydralisks should be left behind to deal with incoming Scouts and Corsairs, which can bypass the block.
Mission 1-4: There is not much room for error, as resources are vastly limited. The real goal is to defeat the Zerg, but you may also want to deal with the Terrans and Protoss to secure their mineral patches. The Zerg base can become well-defended quickly, and it is suggested that an attack on their expansions be as soon as possible. Sometimes the Protoss may actually beat the Zerg for you, but keep in mind they will also attack you, too.
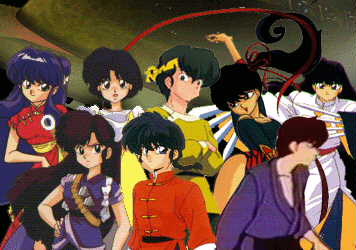
Mission 1-5: Sit back and relax; have fun picking out all the familiar faces.
Mission 2-0: There is not much to this map other than to watch each characters' hit points; fast characters like Ryoga can die quickly if you're not paying attention. Also, you need to be quick when dealing with the Infested Terrans; any one of them can end your career as a Hero fast.
Mission 2-1: This map operates under the same suggestions as above, save that all the characters have just as much chance to get pasted. Again, watch hp levels and heal using Akane if necessary. If anyone becomes seriously injured keep them behind the others to help them survive longer.
Mission 2-2: The difficulty in this map is it's length and the scarcity of healing beacons. Try to conserve your hp whenever possible (ie don't blindly throw yourself at the enemy).
Mission 2-3: Cutscene mission.
Mission 2-4: This starts as a standard defense mission, but don't concentrate on it; the Zerg will overwhelm you no matter what. After the cutscene, however, you are free to annihilate the Zerg base (with ease using the Great Phoenix). The last-ditch attack can easily be deflected by your allies, so it is not too big a concern.
Mission 2-5: Cutscene mission with a boss.
Mission 3-0: The primary focus here is the special abilities of Optic Flare and Disruption Web combined with other units. For the first half use Optic Flare on any Overlords you see as soon as possible to allow Kuno to defeat the sunken colonies. In the second half use Disruption web on the sunken colonies (not the spore colonies) in order to allow Kuno to topple spore colonies in peace.
Mission 3-1: There is not much to this mission; just stay alive. Also, it is not advisable for Mousse to be attacking around the estate, as he could easily destroy the Dragon's Tear himself.
Mission 3-2: While in the cavern the Dragon's Tear can be attacked without warning and be destroyed by a large group of Hydralisks; don't stray too far from the entrance until the Hydralisk group has been defeated first (you'll know when they're coming). Deal with the enemies as usual, and return to the Dragon's Tear to heal, if necessary.
Mission 3-3: After setting up the base the Zerg will attack relentlessly until you run out of resources; you must attack their bases early before they can mass a large assault and kill one of your Heroes. While your base is building the Great Phoenix should be clearing out Zerg structures by itself. Using just the Heroes to attack can speed up the process, but it is also risky; you can't heal them this time around.
Mission 3-4: A difficult defense mission. The primary concern is to keep the Zerg away from the Khaydarin core until the Interceptors are repaired. Watch your characters' hp and pull them to the back if they become too weak. Once the Interceptors are complete the mission becomes much easier.
Mission 3-5: The Carrier mission. Your primary weapon will be the Great Phoenix's Interceptors; use Kizrath's Wing to take out any Mutalisks attacking the ship. Slowly make your way through the map (it doesn't matter which path you go through) and don't put the ship at great risks. If it survives reasonably well it can also be used to clear out the central island, which is a great help.
Mission 4-0: This mission highlights the abilities of the High Templar: Psionic Storm and Hallucination can easily bring favor to your side in the right situations. Since you can't kill the Terran troops you will be limited to where you can go. Don't use the Attack-Move commands. After the incident at the Tendo Dojo one of the Terran guards will get killed by Lurkers, so now you can cross the river. It is possible to use Hallucinations to 'trick' your way across the bridges.
Mission 4-1: There are two entrances to your base, and you must defend both of them equally. Quickly build the Driller and enough support troops to escort it to the island (you WILL need those Mutalisks to guard it). During the second half when using the Great Phoenix be careful not to destroy Strassenburg's command ship, as she is quite eager to fly into battle.
Mission 4-2: Cutscene mission.
Mission 4-3: This mission highlights the abilities of the Defiler: namely, Dark Swarm, Plague, and Consume. Similar to the mission in part 2 this one requires you to be extra-careful with what you do with your Heroes (don't throw them into battle blindly). Dark Swarm is extremely useful for all your characters (they're either melee or deal splash damage, neither of which are affected by Dark Swarm).
Mission 4-4: This mission highlights the abilities of the Ghost: Cloak, Lockdown, and Nuclear Strike. A piece of cake; just build the nuke silo, the nuke, and the nuker. Use the Warbringers provided to help plow through the Terrans at the penninsula, and be sure to knock out all the Missile Turrets. Target your nuke on the command ship and you're set (make sure you're cloaked first). You may wish to Lockdown the command ship to prevent it from flying out of range.
Mission 4-5: The quickest way to beat this mission is to load your shuttle with your Heroes and Reavers and drop them in the enemy bases (not recommended for everyone, but it is possible). Otherwise, treat this mission like the last Terran mission in the Starcraft campaign; be ready for nukes and be ready to push yourself out of a corner pocket.
Mission 5-0: You just need to keep your Heroes alive.
Mission 5-1: Cutscene mission.
Mission 5-2: Simply another build and destroy mission, only with many allies. Take your time if you wish, and be sure to 'rescue' the extra Heroes from each of your allies' camps (they change depending on what path you took). In a four-way war the victory will inevitably fall to you.
Mission 5-3: The objectives are all the same, but the obstacles change depending on which path you took. Whenever a Hero gets beat up escort him/her back to the healing beacon at the entrance. This is otherwise similar to the mission in part 3; take it one step at a time and you will succeed.
Mission 5-4: All your skills as a Starcraft player are put to the test here. Suggestions can be found in the Bosses guide.
Mission 5-5: Cutscene mission. I hope you enjoyed yourself.
Bonus Mission: You can recruit many powerful heroes throughout the concert hall; they are not hard to miss. The more Heroes the easier the final battle becomes.
[an error occurred while processing this directive]